 |
...Back...|...Prorject Chopper...|...The Gallery...|...Hondachopper Home... . ...Page 1...|...Page 2...|...Page 3...|...Page 4...|...Page 5...|... |
|
...Back...|...Prorject Chopper...|...The Gallery...|...Hondachopper Home... . ...Page 1...|...Page 2...|...Page 3...|...Page 4...|...Page 5...|... |
|
Jim's
Chopper Diary - Houston, we have a problem!
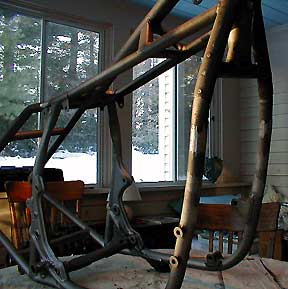
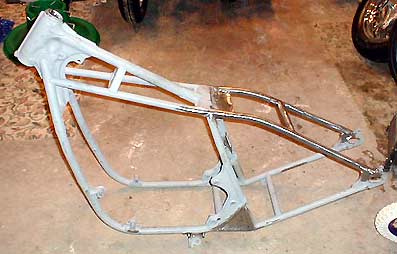
March 2001 - Page 3 FRAME UPDATE:
Not willing to live with this, my buddy Dickie cut the two top tubes from the seat to the rear axel off and made some new ones that fit nicely and looked great. |
|
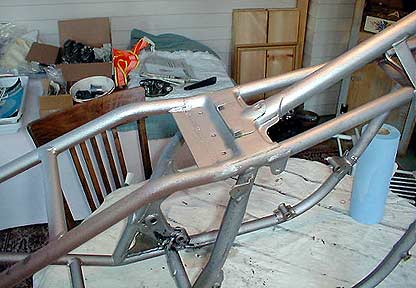
I also welded some filler plates out of 1/8" stock in the triangles at the bottom to clean them up. All in all, it looks very kick-ass. The back leg of the triangle is made out of some of the old tubing from the part of the frame I cut away. All in all, it looks pretty good. A local stove shop did the sandblasting for me -- $30 for frame and fender. |
Bondo is the chopper builder's best friend! |
Jim's had problems with this nasty hump- but it looks like now he's got that hump licked now! |
| . | . |
| I
am getting better at the welding thing, although I am no expert.
There were about 40 holes in the fender, and welding on thin metal
is tough. I backed all the holes with pieces of thin plate.
(TIP: Remember to take a close up of the fender before I Bondo it up). Thank God for Bondo to hide my welding atrocities...although I plan to use very little...I don't mind if it looks a bit homemade, and I don't want a lot of filler. |
 |
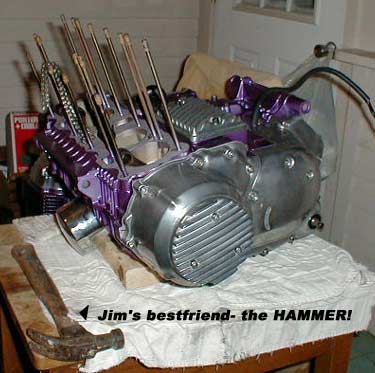
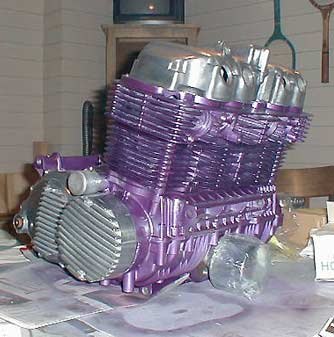
The Heart of the Beast is Purple!! |
Engine
Update:
After finishing the painting and the polishing of the sidecovers and cam box, I began to reassemble the engine. Pretty straightforward, except that one of my pistons was cracked on the skirt. Fortunately, Bud Jordan from the SOHC4 list had just had an engine re-bored to accept larger pistons, and his old pistons were serviceable. Free parts are a great thing about the internet bike lists and having buddies who share your interests. The next snafu came when I had FINISHED reassembling the top end only to discover that I had left the 8 oil gallery dowel pins and o-rings out of the engine, and had to strip it down and start over. TIP: Always count your parts at the end of the project. |
| Unfortunately,
I had used gasket sealer which effectively glued the cylinders to the head
and the cases. I completely ruined the gaskets getting it apart and
had to buy new ones.
You're not SUPPOSED to use gasket sealer, but the base and head gaskets are one of the few places these bikes will start to leak oil eventually. It finally got finished the second time around, and all appears to be well. I still need a clutch pressure plate, but it'll be a while before I am ready to fire it up. Forward
Controls Update:
|
 |
|
I found some chrome footpegs at Toys 'R' Us for $9.00 -- much cheaper than the HD stores! They are the kind used for trick MX bikes for kids, and were perfect for my needs. I am currently mocking them up on the bike to get them right -- and I may even send them to a guy in MA to chrome plate them. The total cost will be less than $100, plus whatever chrome costs (if I even decide to do that). They will look quasi-homemade, inevitably, but if anyone likes them I will gladly share the patterns, etc. The best present I got last year was the complete index of VERY sharp machinists drill bits from a friend's father who owns a machine shop....very handy for drilling thru steel plate! |
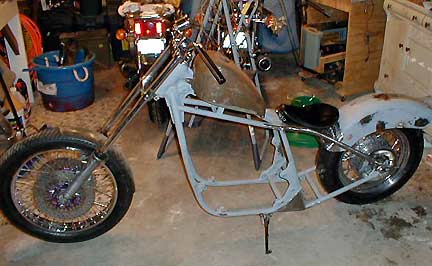
| Dry
fitting and next steps:
I have now got all the various pieces back in my own garage, and have started to assemble the bike to make sure everything fits up before disassembly and painting (which I plan to do as soon as it gets warm enough). The front end looks great, and I am happy with the light and handlebars I purchased (new!!). The rear fender that I spent so much time welding and grinding on (off an HD FXWG) may not make it to the finished bike. |
 |
| Likewise,
the Fat Bob tanks I bought with the sectioned-in oil tank will also
likely not be used (too hard
to fit -- cut the frame or cut the tanks, and I don't want to do either!). I have a Sportster tank sitting on it for now as I mull it all over, but I think I am still in the hunt for the "perfect" tank for my project -- anyone? Once I figure out the tank, fender, battery box, and oil tank solutions -- and weld on any brackets I need to support them -- I'll be painting and assembling, then eventually moving on to wiring. FINDING an oil tank, tank, and fender may hold me up for quite some time, however -- so I am hoping to get lucky real quick. SPRING IS COMING!Been a long time since I spent any time on the bike, and I'm glad it's coming along again. JIM in NH |
![]()